


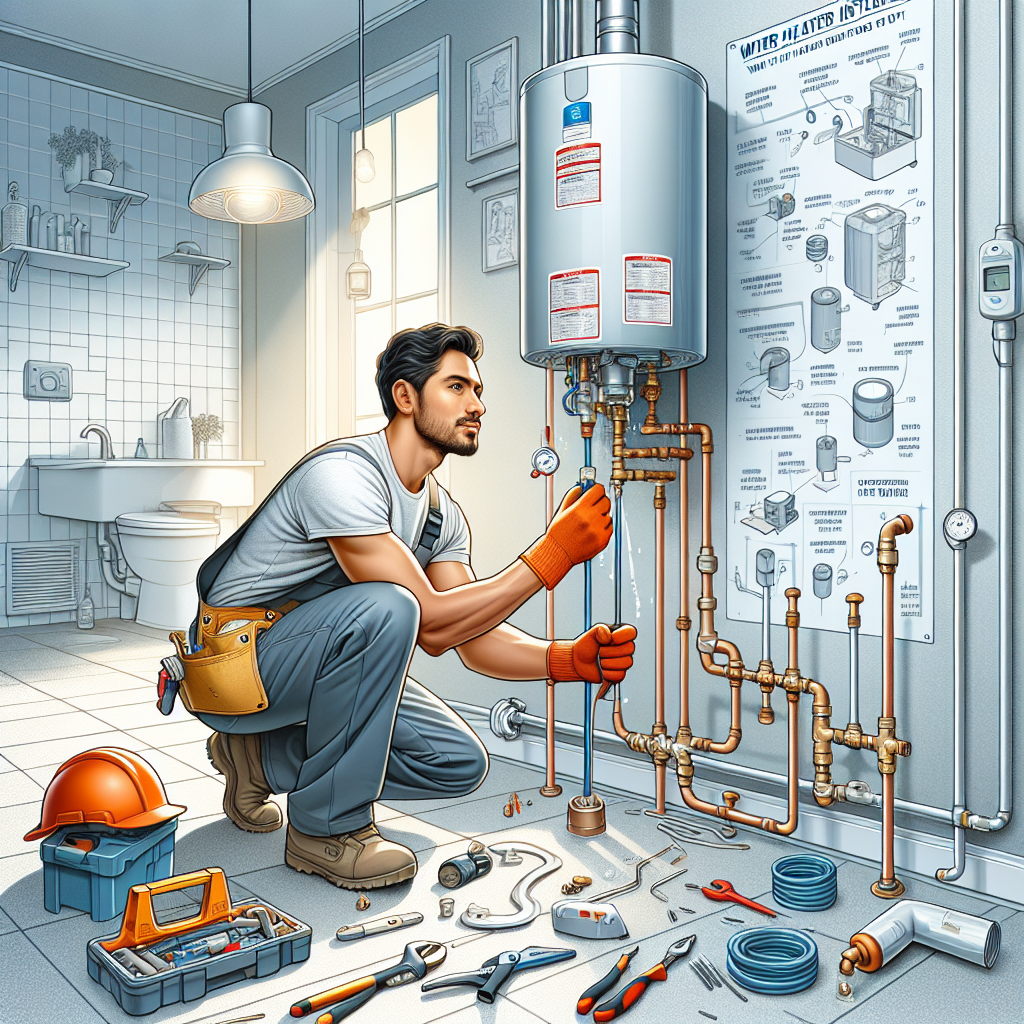
Ultimate Guide: Water Heater Installation – What You Need to Know Before You Start
Understanding Different Types of Water Heaters
Choosing the right water heater can feel like picking a favorite child—every option has its merits, and they all seem to have their own quirks. Did you know that nearly 18% of your home's energy consumption comes from heating water? That's a significant chunk of change if you’re not careful about your choice.
Storage Tank Water Heaters
The classic workhorse of the water heater world. Storage tank heaters are what most people think of when they picture a water heater—big, bulky tanks that hold anywhere from 20 to 80 gallons of hot water. They continuously heat the water, so you always have hot showers, but that also means they're constantly sipping energy while waiting for you to need a rinse.
Pro Tip: If you're a fan of long showers or have a large family, this might be your best bet!
Tankless Water Heaters
These sleek little gadgets are like the ninjas of the water heating world—efficient and stealthy. Tankless heaters heat water on demand, which means no more cold surprises mid-shampoo. They’re great for smaller homes or for those who only need hot water occasionally. However, if you’re trying to run multiple showers simultaneously, be prepared for some serious negotiating.
Heat Pump Water Heaters
Wait, what? A heat pump for my hot water? Yes! These innovative systems use electricity to move heat from one place to another instead of generating it directly. They can be incredibly efficient in moderate climates but may struggle in colder areas. Think of them as the eco-friendly cousin who brings organic snacks to family gatherings—great intentions but sometimes impractical.
(Bonus) Solar Water Heaters
Harnessing the power of the sun sounds fantastic! But before you start dreaming about endless hot showers powered by solar panels, consider your location and budget. These systems can significantly reduce utility bills but often require a hefty upfront investment and plenty of sunshine. If you're living in a perpetually cloudy area, this might not be the best option.
- * Storage Tank: Reliable but energy-hungry.
- * Tankless: Efficient but potentially limited during high demand.
- * Heat Pump: Eco-friendly yet location-sensitive.
- * Solar: Great savings if conditions are right!
Regulatory Requirements and Permits
Ignoring regulatory requirements for water heater installation is like trying to bake a cake without checking if you have all the ingredients. You might end up with a big, hot mess instead of a delicious dessert. Did you know that in some states, failure to comply with local codes can lead to fines up to ,000? That's not just a slap on the wrist; it's a serious hit to your wallet!
Understanding Local Codes
Every municipality has its own set of codes and regulations governing water heater installations. These regulations are in place not only to ensure safety but also to promote energy efficiency. For instance, some areas require specific insulation levels or energy ratings for new units. It's essential to check with your local building department before you start ripping out your old water heater.
Permits: Do You Need One?
In many cases, yes! Obtaining a permit is often required for water heater installations—especially if you're making significant changes to plumbing or electrical systems. Think of it as your golden ticket; it ensures that your installation meets safety standards and can be inspected by professionals. Skipping this step could mean having to redo the entire job after an inspector takes a peek.
- Check local building codes for specific requirements.
- Obtain necessary permits before starting work.
- Consider hiring a licensed plumber who understands local regulations.
Important: Always verify whether permits are needed in your area before beginning installation.
(Bonus) The Inspection Process
Inspection sounds daunting, but think of it as a health check-up for your new water heater. After installation, an inspector will come by to ensure everything is up to code and functioning safely. This step is crucial because it protects you from potential hazards down the line, like leaks or electrical issues that could become costly problems later.
'So, what’s next? Before you start tearing into walls or disconnecting pipes, make sure you've done your homework on local regulations and secured any necessary permits. Your future self—and wallet—will thank you!'
Ignoring regulatory requirements for water heater installation is like trying to bake a cake without checking if you have all the ingredients. You might end up with a big, hot mess instead of a delicious dessert. Did you know that in some states, failure to comply with local codes can lead to fines up to $5,000? That's not just a slap on the wrist; it's a serious hit to your wallet!
Understanding Local Codes
Every municipality has its own set of codes and regulations governing water heater installations. These regulations are in place not only to ensure safety but also to promote energy efficiency. For instance, some areas require specific insulation levels or energy ratings for new units. It's essential to check with your local building department before you start ripping out your old water heater.
Permits: Do You Need One?
In many cases, yes! Obtaining a permit is often required for water heater installations—especially if you're making significant changes to plumbing or electrical systems. Think of it as your golden ticket; it ensures that your installation meets safety standards and can be inspected by professionals. Skipping this step could mean having to redo the entire job after an inspector takes a peek.
- Check local building codes for specific requirements.
- Obtain necessary permits before starting work.
- Consider hiring a licensed plumber who understands local regulations.
Important: Always verify whether permits are needed in your area before beginning installation.
(Bonus) The Inspection Process
Inspection sounds daunting, but think of it as a health check-up for your new water heater. After installation, an inspector will come by to ensure everything is up to code and functioning safely. This step is crucial because it protects you from potential hazards down the line, like leaks or electrical issues that could become costly problems later.
'So, what’s next? Before you start tearing into walls or disconnecting pipes, make sure you've done your homework on local regulations and secured any necessary permits. Your future self—and wallet—will thank you!'
Preparing for Installation: Site Assessment
Before you start tearing down walls and wrestling with pipes, take a moment to assess your installation site. You wouldn’t build a house on quicksand, right? The same principle applies to water heater installation. A thorough site assessment can save you from headaches down the road—like unexpected leaks or a unit that doesn’t fit where you hoped it would.
Evaluating Space Requirements
First things first, measure your space. Water heaters come in various shapes and sizes, and not all will fit snugly in your utility closet. For example, if you're eyeing a storage tank heater, ensure you have enough vertical clearance for the unit and the necessary ventilation. A common mistake is assuming that because it looks like it will fit, it actually will.
Now, consider the surrounding area. Is there enough room for maintenance? You’ll want at least a couple of feet of clearance on all sides for easy access during repairs or inspections. Otherwise, you might find yourself playing contortionist every time something goes wrong.
Checking Utility Connections
Next up: utility connections. Check the existing plumbing and electrical setup before making any commitments. If you're upgrading to a tankless model but your current plumbing can’t handle the flow rates, it’s time to rethink your strategy—or at least budget for some additional work.
Pro Tip: Inspect gas lines if you're switching from electric to gas models; they often require different setups.
(Bonus) Assessing Ventilation Needs
Ventilation is crucial, especially for gas water heaters. Improper ventilation can lead to dangerous carbon monoxide buildup—a serious health hazard. Make sure there’s an appropriate venting system in place before you even think about firing up that new heater.
(Bonus) Considering Local Climate Factors
Climate matters! If you live in an area with cold winters, ensure your water heater is rated for low temperatures. An improperly rated unit could struggle to keep up during peak usage times, leaving you with icy showers when you need them most.
To wrap things up: taking the time to assess your installation site not only prepares you for success but also protects against future issues that could drain both your wallet and patience.
So grab that tape measure and take stock—your future self will be grateful!
Tools and Materials Required for Installation
Think you can just waltz into a water heater installation with a screwdriver and some duct tape? Think again! Installing a water heater requires more than just enthusiasm and a YouTube tutorial. You need the right tools and materials, or you might end up with a hot mess instead of hot water.
Essential Tools
Here’s your toolkit checklist—these are the must-haves for any DIY water heater installation project:
- Pipe wrench: For those stubborn pipes that refuse to budge.
- Adjustable wrench: Because sometimes, size really does matter.
- Screwdrivers (flathead and Phillips): The dynamic duo for securing brackets and covers.
- Pliers: Perfect for gripping, twisting, or even pulling out that one rogue wire.
- Level: To ensure your heater isn’t tilting like it just had one too many drinks.
- Drill: For making holes in places you didn’t think needed holes.
Materials You’ll Need
Now that your toolbox is ready, let’s talk about the materials. Here’s what you’ll need to have on hand before you start:
- * New water heater: This one’s kind of essential. Choose wisely based on your needs!
- * Water supply lines: PEX or copper—pick your poison.
- * Gas supply line (if applicable): Don’t forget to check local codes on this one.
- * Venting materials (for gas heaters): Proper venting is crucial to avoid hazardous situations.
- * Teflon tape: For sealing threaded connections and preventing leaks—because nobody likes a drippy surprise!
- * Drain pan: To catch any potential leaks below the unit.
'So what's next? Now that you've got your toolkit assembled and materials ready to roll, it's time to get familiar with the specific requirements of your new water heater. Each model can have its quirks, so read up on those manuals like they’re your favorite novel.'
Step-by-Step Installation Process
Ever tried assembling IKEA furniture without the instructions? Yeah, water heater installation can feel just like that—confusing and potentially disastrous if you miss a step. Let's break it down into a foolproof, step-by-step process so you can avoid any DIY disasters.
Step 1: Gather Your Tools and Materials
Before you start, make sure you've got everything at your fingertips. You wouldn’t want to run to the hardware store mid-installation because you forgot that crucial pipe wrench. Here’s a quick checklist:
- Pipe wrench
- Adjustable wrench
- Screwdrivers (flathead and Phillips)
- Pliers
- Level
- Drill
* Don’t forget the new water heater itself!
Step 2: Shut Off Utilities
Safety first! Before you do anything else, turn off the power supply (for electric heaters) or shut off the gas line (for gas heaters). Trust me, nobody wants to play with live wires or gas leaks while installing a water heater.
Step 3: Drain the Old Heater
Time for some plumbing magic. Connect a garden hose to the drain valve of your old water heater and let it empty into a suitable drainage area. This might take a while, so grab a coffee or catch up on your favorite show while you wait.
(Bonus) Step 4: Disconnect Old Connections
Here comes the fun part! Once drained, disconnect the water supply lines and any electrical or gas connections. Remember to keep track of which connections go where; labeling them can save you from future headaches!
Step 5: Install New Water Heater
Now for the star of the show! Position your new water heater in place, ensuring it’s level—nobody wants an unbalanced unit. Connect the water supply lines and ensure all fittings are secure.
(Bonus) Step 6: Reconnect Utilities
Reconnect your power or gas supply according to local codes. For gas heaters, this includes ensuring proper venting is in place to avoid any hazardous situations.
Step 7: Fill and Test
Turn on the water supply and let it fill up your new heater. Check for leaks around all connections—this is where having that drain pan comes in handy! Once filled, turn on power or gas and test out your hot water.
Pro Tip: Run hot water from various taps to ensure everything is functioning smoothly.
Common Challenges During Installation
Imagine this: you’ve finally decided to tackle that water heater installation yourself, armed with YouTube tutorials and a toolbox full of shiny new tools. But then, bam! You hit a snag—maybe it’s the wrong size unit or outdated plumbing. Suddenly, your DIY dreams feel more like a nightmare.
Water heater installation can be a walk in the park or a trip through the jungle—depending on how well you prepare. A staggering 30% of DIY installations end up requiring professional help due to unforeseen complications. So, what are these challenges lurking in the shadows?
Sizing Issues
One of the biggest hurdles is choosing the right size water heater. Too small? You’ll be left shivering mid-shower. Too large? Your energy bills will skyrocket faster than you can say hot water. A family of four may need a 50-gallon tank, while a couple might get away with just 30 gallons. Measure your space and consider your hot water needs before making that purchase.
Outdated Plumbing
Old pipes can be like stubborn relatives at Thanksgiving—refusing to budge when you need them to. If your home has aging plumbing, it might not support new models or higher flow rates from tankless systems. Inspecting your existing setup before diving into installation can save you from costly surprises later.
* Pro Tip: Consider hiring a plumber for an assessment if your plumbing is older than your last smartphone!
(Bonus) Ventilation Challenges
Ventilation? What’s that? If you’re installing a gas-powered heater, neglecting proper ventilation could lead to serious safety hazards—like carbon monoxide buildup. Ensure there’s an appropriate venting system in place before even thinking about firing up that new heater.
(Bonus) Local Code Compliance
Who needs permits anyway? Spoiler alert: ignoring local codes can land you in hot water (pun intended). Many municipalities require permits for installations; failing to comply could result in fines—or worse, having to redo everything after an inspection reveals your shortcuts.
So what’s next? Before you grab that wrench and dive headfirst into installation chaos, take a moment to review these common challenges and prepare accordingly. Your future self—and hot showers—will thank you!
Leave A Comment