


Planning a water heater installation in Lehigh Valley requires more than picking a model; local fuel availability, venting rules and permit requirements materially affect cost and outcome. This guide gives realistic installed cost ranges for tanks, tankless and heat pump hybrids, explains which technologies suit Allentown, Bethlehem and Easton homes, and provides a step-by-step checklist that highlights what homeowners can prep and what must be handled by a licensed plumber. Use it to set a practical budget, avoid common permit and safety pitfalls, and decide whether to hire local pros.
1. Typical installed cost breakdown for Lehigh Valley homes
Realistic installed buckets: In Lehigh Valley you should expect three practical cost bands for a full water heater installation: conventional tank units typically $800 to $1,800 installed, tankless systems typically $1,500 to $3,500 installed, and heat pump/hybrid units typically $2,000 to $4,500 installed. Sites with poor access, old venting, or undersized gas or electrical service commonly push final price above these bands.
Line-item components that drive the total
Breaking the job into pieces makes estimates comparable. The obvious line items are unit cost, labor, permit, disposal, materials, and any site upgrades. Less obvious but common cost drivers are gas line upsizing, stainless or direct-venting, a new 240V circuit, and unexpected roof or chase work.
- Unit price: Conventional tanks $300 to $900, tankless $700 to $2,000, heat pump $1,000 to $2,200
- Labor: Typical Lehigh Valley plumber rates run about $100 to $150/hour; simple tank swaps often 2–4 hours, complex conversions 6–12 hours
- Permits and inspection: $50 to $250 depending on municipality (Allentown, Bethlehem, Easton vary)
- Disposal and materials: $75 to $300 for disposal, fittings, valves, and TPR/expansion tank
- Common upgrade costs: Gas line upgrades $200 to $1,200; venting modifications $150 to $800; electrical panel or 240V circuit $400 to $3,000
Practical limitation: Tankless installs often look inexpensive on unit price but regularly require gas and venting work that doubles the labor and materials line. If your home has an older meter or narrow service line, plan for a gas contractor or utility coordination that adds both time and cost.
Concrete example: A 50-gallon Rheem Performance electric replacement in an Allentown basement: unit $450, fittings and TPR valve $150, labor 3 hours at $120/hr $360, permit $75, disposal $75 — final around $1,110. A Rinnai RL94 tankless swap that needs new venting and a short gas line upsizing commonly totals $2,200 to $3,000 once labor and materials are included.
| Technology | Typical installed low | Typical installed high | Likely extras to budget |
|---|---|---|---|
| Conventional tank (electric/gas) | $800 | $1,800 | Disposal, minor plumbing, permit |
| Tankless (gas) | $1,500 | $3,500 | Gas line sizing, stainless/direct venting, water treatment |
| Heat pump / hybrid | $2,000 | $4,500 | 240V circuit, condensate drain, clearance space |
2. Water heater technologies and real model examples for Lehigh Valley homes
Key point: For Lehigh Valley residences, technology choice is mostly about site constraints and household demand, not marketing. Pick the system that matches your fuel access, venting options and peak simultaneous use rather than the model with the fanciest efficiency number.
How the main options behave in typical Lehigh Valley houses
Conventional tanks: These remain the simplest to install and easiest to maintain in basements and utility closets. Strengths are predictable performance and tolerance for variable inlet temperatures; limits are standby losses and shorter useful life compared with some newer systems. For homes with limited electrical capacity or complicated venting, a tank often avoids big site upgrades.
Tankless on-demand units (Rinnai V Series, Navien NPE): Real advantage is space and reduced energy spent heating standby water. Practical tradeoffs include the need for correctly sized gas piping and stainless or certified direct-vent runs, and reduced output when inlet water is very cold. In Lehigh Valley winters you must size for worst-case inlet temperatures and consider a buffer or recirculation if multiple fixtures run at once.
Heat pump / hybrid units (Rheem ProTerra, AO Smith Voltex): These are the most energy-efficient electric choice when basement space is available. They recover cost over time if electricity prices and available rebates line up, but they need clearance, produce some noise, and perform best in conditioned or semi-conditioned spaces. They are not a drop-in replacement where the current location is a tight closet or an unheated attic.
- Practical insight: Hard water in the region increases maintenance needs for tankless units; expect routine descaling unless you install water conditioning.
- Fuel/joint constraint: A high-BTU tankless requires larger gas service — check meter capacity before budgeting for venting or meter upgrades.
- Installation reality: Heat pump hybrids often require a 240V circuit and a planned condensate drain route; failure to plan these causes delays.
Concrete example: A Bethlehem split-level with a family of four moved from a failing 50-gallon tank to a Navien NPE tankless. The team upsized the gas line and installed a stainless coaxial sidewall vent; during sizing they added a small 2-gallon buffer to smooth multiple simultaneous draws. The house gained nearly continuous hot water for showers, but the install required coordination with the gas utility and added a short delay for the vent chase permit.
Judgment call homeowners miss: Efficiency numbers sell well on paper, but in practice the mismatch between model and site drives most regrets. A high-efficiency tankless with undersized gas or poor venting will cost more and perform worse than a correctly sized conventional tank. Treat venting, meter capacity and local winter inlet temperatures as primary constraints — not optional extras.
Choose the technology that your house enables, not the one you prefer on specs. Confirm venting and service capacity before buying a unit.
3. How to choose capacity and fuel for your household
Straight truth: Choose capacity and fuel based on peak simultaneous demand and on-site service capacity, not on marketing claims or lowest unit price. Get those two right and the system will perform; get them wrong and you pay for upgrades or live with disappointing hot water.
Sizing framework — practical steps
- Measure real use: Add up fixtures likely to run at the same time using typical flow rates: showers 1.5–2.5 GPM, lavatory faucet 0.5–1.0 GPM, dishwasher 1–2 GPM, washing machine 2–3 GPM.
- Choose method by technology: For tanks use the required First Hour Rating (FHR) that covers your morning peak. For on-demand systems total the GPM and add a safety margin for cold-weather derating and multiple simultaneous draws.
- Check inlet temperature effect: Tankless manufacturers publish derating curves — colder inlet water reduces output GPM. Size to worst-case winter inlet, not average summer conditions.
- Confirm site capacity: Before you buy, confirm gas meter BTU rating or available breaker capacity for electric/heat pump options and plan for any upgrades.
Practical tradeoff: Tank systems hide peak demand with stored volume but waste standby energy; tankless eliminates standby loss but forces correct GPM sizing and usually requires stronger gas or upgraded venting. Heat pump hybrids save energy where you have space and electrical capacity but need clearances and condensate routing.
Concrete example: A three-bath home where two showers and a washing machine often run at once calculates like this: two showers at 2.0 GPM + washer at 2.5 GPM = 6.5 GPM. To meet that with a tankless you would pick a model that still delivers ~6.5 GPM at winter inlet temperatures after accounting for derating and any long vent runs; otherwise a properly sized tank may be the simpler, more reliable choice.
Fuel considerations and on-the-ground constraints
Local reality: Most homes with an existing natural gas connection will find gas options least disruptive — but only if the meter and piping can handle the BTU demand. Utility coordination or a service upgrade can add weeks and cost, which people often neglect when comparing quotes.
Electric and hybrid trade-offs: Electric tanks and heat pump hybrids avoid venting complexity and combustion safety rules, but they need available 240V capacity. A panel that is already tight may force a costly electrical upgrade. Check rebate opportunities before choosing a heat pump; that can change the math. See PPL rebates for program details.
Site constraint checklist (do this before you buy): Photograph the current venting path, read the gas meter label for its max BTU, and note the main breaker rating. These three simple checks catch most surprises that turn a cheap unit into an expensive project. If any of these items raise questions, call a licensed installer to inspect before purchase — see water heater installation for local support.
4. Step-by-step installation checklist and tasks that require a licensed plumber
Direct point: A smooth water heater installation is a sequence of narrow technical gates — skip the right professional checks at any gate and you pay in delays, failed inspections, or voided warranties.
Homeowner actions that reduce time and avoid surprise charges
- Clear the work path: Remove furniture, boxes, and shelving so installers can carry the new unit straight in; tight maneuvers add labor time.
- Document the existing setup: Photograph the wall/ceiling where vents or pipes exit, and snap the electric panel label — installers use those photos to quote correctly.
- Provide easy access and parking: A long carry from curb to basement can add an hour; reserve parking or notify neighbors.
- Collect paperwork: If you have model/serial numbers, prior warranty papers, or water quality notes, hand them to the crew — they cut troubleshooting time.
Phased checklist with explicit licensed-plumber gates
- Phase 1 – Site verification (can be an estimate visit): Installer confirms vent path, fuel service capacity, and electrical availability. Licensed plumbers must perform gas meter load checks and breaker capacity verification.
- Phase 2 – Permit pull and scheduling: If a permit is required, a licensed contractor pulls it and schedules inspection windows. Do not start work before permits are issued.
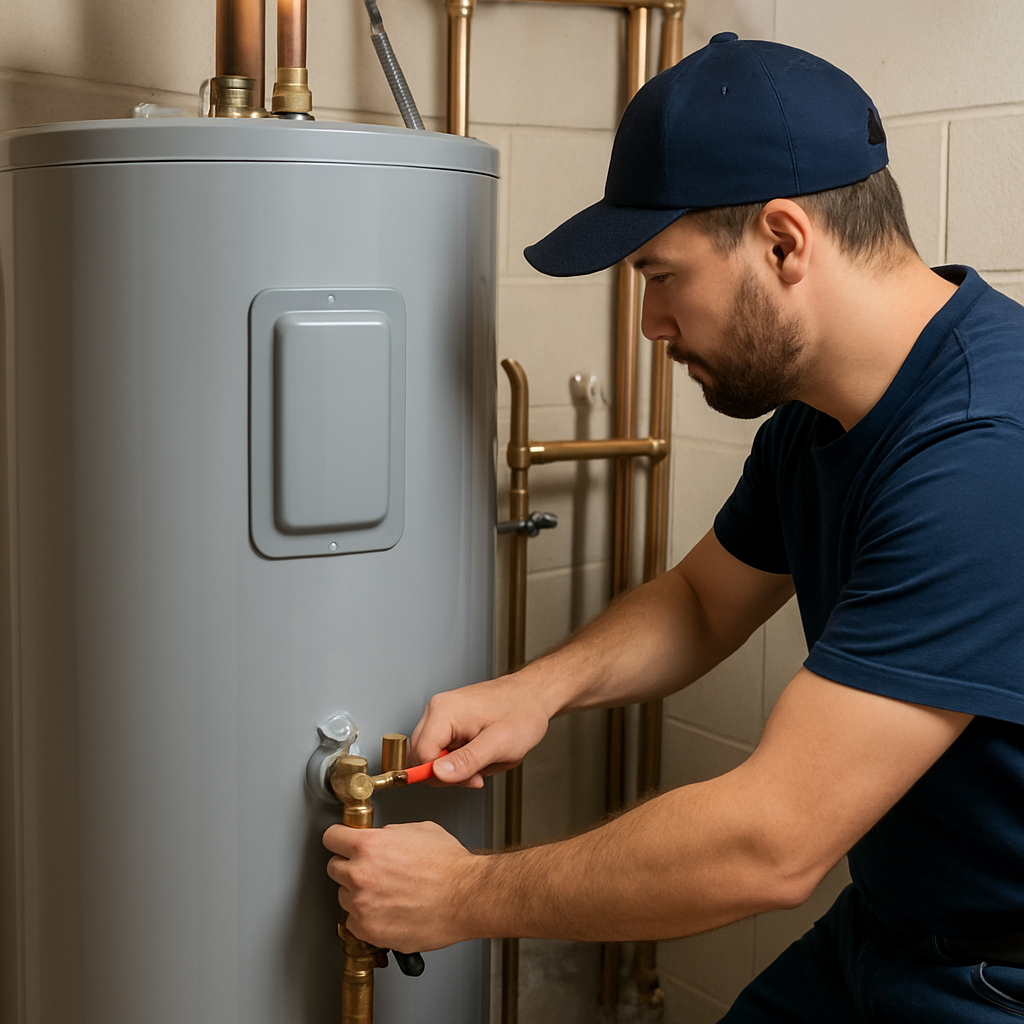
- Phase 3 – Old unit removal and safe isolation: Drain and disconnect the old unit; cap the gas line and de-energize circuits. Plumbers should cap gas and electricians should isolate high-voltage circuits.
- Phase 4 – Rough-in of upgraded services: Install or upsized gas piping, stainless/direct venting, or a dedicated 240V circuit as needed. These are licensed trades tasks and must follow code and inspection-ready practices.
- Phase 5 – Final hookups and safety fittings: Connect water lines, install TPR valve and expansion tank, make final gas/electrical terminations, and complete condensate routing for hybrids. Licensed plumbers complete pressure and leak tests; electricians perform final circuit tie-ins.
- Phase 6 – Combustion and draft testing, inspector sign-off: Perform combustion analysis, vent draft checks, and system startup. Inspector approval and a licensed plumber's sign-off are required for warranty validity and resale safety.
Practical tradeoff: You can save on hourly labor by doing prep work, but attempting any of the licensed tasks above without credentials usually creates rework that costs more than hiring a pro in the first place. Permits and inspections exist because mistakes here are hidden risks.
Concrete example: In an Allentown split basement, the homeowner cleared the access, supplied photos of the existing vent chase, and moved the old tank outside for disposal. The licensed crew then upsized the gas run, installed a stainless sidewall termination, completed a pressure test, and left the job inspection-ready the same day. That prep cut onsite labor by about an hour and avoided a return trip.
Licensed-plumber red flags: any gas work, vent penetration changes, electrical service upgrades, and final pressure/draft tests — do not attempt these yourself.
5. Permits, inspections and incentives in Lehigh Valley
Straight fact: most water heater installation jobs in Allentown, Bethlehem and Easton trigger a permit when the work changes gas piping, venting, or electrical service, or when a new location is created. Permit rules and processing look similar but they are enforced differently across the three jurisdictions, and that enforcement is where projects commonly slow or fail.
Who files permits and what inspectors look for
Practical reality: licensed installers typically pull the permit because municipalities expect a contractor who can sign off on gas and electrical work. Inspectors are municipal building or plumbing/code officials; they focus on combustion safety, correct venting and combustion-air, proper TPR discharge routing, secure gas connections, and electrical compliance for 240V or heat pump units.
- Common inspection failures: improper flue terminations or unsupported vent sections
- Common inspection failures: TPR valve not piped to the exterior or trapped condensate lines
- Common inspection failures: undersized or unapproved gas connectors and missing expansion tank where required
- Common inspection failures: incorrect breaker sizing or lack of a dedicated circuit for hybrids
Tradeoff to accept: paying a professional to handle permits adds upfront cost but prevents rework, delayed closings at sale time, and potential denial of insurance claims. If you attempt to self-handle a job that touches gas or the main electrical service, expect longer timelines and a higher chance of failed inspections unless you know local code language.
Concrete example: A homeowner in Bethlehem replaced a rusted tank but skipped the permit to avoid the fee. During a later sale the buyer s inspector flagged an unpermitted gas vent modification. The seller had to hire a licensed contractor, pull the proper permit, and redo the vent to pass inspection, which delayed closing and required additional work the seller had not budgeted for.
Incentives that change the math: utility and federal programs can materially reduce upfront cost for energy-efficient installs, but they usually require pre-approval or certified installers. Check available programs before you buy – see PPL energy programs for local rebates and pumpwater_heaters target=_blank>ENERGY STAR heat pump water heaters for qualification rules. Manufacturer rebates also exist, but they often require registration and proof of permit and installation by a certified technician.
Important: failing to register the install with the utility or manufacturer can void rebates and even some warranty provisions.
Next consideration: before you accept any quote, confirm who handles the permit and rebate paperwork, and ask for an estimated inspection timeline so you can factor potential municipal delays into your project schedule. For permit-handling and on-site eligibility checks see water heater installation.
6. Maintenance, expected lifespan and cost of ownership
Bottom line: maintenance determines whether a water heater is an inexpensive appliance or a recurring bill you tolerate. Regular, modest service preserves capacity, avoids emergency replacements, and is often required to keep manufacturer warranties valid.
Routine tasks and sensible frequencies
- Annual — visual and basic service: flush sediment from tanks, run a pressure/leak check, inspect vent terminations and TPR discharge. A licensed tech should document the visit so warranty conditions are met.
- Every 1–3 years — tankless upkeep: descale or run a vinegar flush if you have hard water, and clean inlet filters; manufacturers often require annual or biennial descaling in higher-mineral areas.
- Every 3–6 years — sacrificial anode inspection: replace the anode on tanks when depleted to prevent internal corrosion; skipping this shortens tank life dramatically.
- Ongoing — heat-pump/hybrid checks: clean or replace air filters, verify condensate drain is clear, and listen for unusual compressor noise; poor ventilation or dirty filters raise operating costs and accelerate wear.
Practical constraint: tankless and hybrid systems save energy only when maintained. In Lehigh Valley homes with moderate-to-hard water, tankless units without a planned descaling schedule become service calls, not savings. If you cannot commit to yearly descaling or install a water treatment device, a traditional tank often costs less over ownership despite lower efficiency.
Concrete example: A Rinnai tankless installed in a Bethlehem home was not descaled for three years. Mineral buildup reduced flow and triggered a heat-exchanger fault that required a $950 part-and-labor repair plus a mandatory service to restore warranty compliance. Contrast that with a nearby house where an inexpensive $120 annual descaling kept the unit operating without downtime.
Repair vs replacement judgment: expect to replace rather than repair once repair costs approach a significant fraction of a replacement and the unit is in its later life. In practice, homeowners who pay repeatedly for compressor, heat-exchanger, or tank failure rarely come out ahead; a replacement with a short warranty gap and a documented maintenance history is usually the smarter financial move.
Key point: document every service visit. Warranties and rebates commonly require proof of maintenance — missing records are the most common warranty killer we see in Lehigh Valley.
7. Local case examples and decision scenarios
Direct point: Real projects break down at two places: unexpected site limits and misaligned goals. Below are three realistic Lehigh Valley scenarios showing the decisions, tradeoffs, and what actually happened on the ground.
Scenario A – Allentown 2-bath rowhome, simple replacement
Situation: A compact rowhome with a failing 40-gallon electric tank in a basement utility nook. The homeowner wants reliable hot water with minimal disruption. Decision: Replace with a 50-gallon conventional electric tank. Why: no venting work, no gas, and the basement location has sufficient clearance.
What happened: Unit $500, fittings and TPR $175, labor 4 hours at $125/hr $500, permit $95, disposal $80 – total approximately $1,350. The crew completed the job same day because no service upgrades were required. Tradeoff: lower operating efficiency versus minimal up-front cost and no permit surprises.
Scenario B – Bethlehem 3-bath split-level, upgrade to tankless
Situation: Family of four with peak simultaneous draws – two showers plus washer. Sizing step: measured peak need ~6.0 GPM at winter inlet. Decision: install a gas tankless unit to eliminate standby losses and gain continuous hot water.
What happened: The selected Rinnai model delivered adequate GPM on paper, but the existing gas meter required an upgrade and a stainless sidewall vent was needed. Job timeline stretched to two weeks for utility coordination and permit approval. Final installed cost rose principally from gas piping and venting work. Practical insight: tankless often shifts cost and schedule into the utility and venting bucket.
Scenario C – Easton family considering a heat pump hybrid
Situation: Household seeks energy savings and has a semi conditioned basement with space. Decision analysis: choose a heat pump hybrid and apply for PPL rebates where eligible. Financial outcome: after rebate and lower electric use the homeowner saw an estimated simple payback of about 5 to 8 years given local electricity rates and typical hot water loads. Limitation: payback depends on continued electric price assumptions and on having enough basement clearance and a proper condensate drain.
Practical tradeoff across scenarios: tank systems reduce installation risk but carry steady operating cost; tankless reduces standby loss but exposes the project to gas meter and venting complexity; hybrids maximize efficiency but need space and potential electrical adjustments. Consider resale, rental use, and maintenance tolerance when choosing – renters and short-term owners usually favor low-install-risk tanks.
Focus installation choices on what your house can support – venting, meter capacity, and space determine feasible options more than advertised efficiency numbers.
8. Why hire Lehigh Valley Plumbing Experts for installations
Straight answer: hire Lehigh Valley Plumbing Experts when your install touches gas piping, venting, electrical service, permits, or rebate eligibility. Those are the things that turn a straightforward purchase into a multi-week, multi-contractor project if they are handled poorly.
How hiring solves the common project failures
What they actually bring: licensed plumbers with local code knowledge, direct experience coordinating municipal inspections, and the documentation practices manufacturers and utilities require for rebates and warranty validation. This reduces the chance of failed inspections, voided rebates, and resale headaches.
- Permit and inspection coordination: the crew files permits correctly and schedules inspections the first time so jobs do not stall.
- Utility and meter coordination: they test gas-meter capacity and handle utility contacts to avoid surprise upgrades mid-job.
- Manufacturer and rebate compliance: installations are performed to the specs manufacturers and PPL programs require, preserving rebates and warranties.
- Post-install validation: combustion/draft testing, pressure/leak tests, and written startup reports that you will need at resale or for warranty claims.
Tradeoff to accept: professional installation costs more up front but it prevents the common outcomes that cost far more—rework to satisfy inspectors, denied rebates, emergency breakdowns from poor venting, or an uninsurable gas connection. If your situation is literally a like-for-like electric tank swap with no circuit or vent changes, a homeowner can save, but that is the exception not the rule.
Real installation example: A Bethlehem family chose a tankless upgrade and the existing gas meter was undersized. Lehigh Valley Plumbing Experts managed the meter upgrade with the utility, installed stainless direct venting, and registered the install for a utility rebate. The coordinated approach avoided two return trips and kept the project on a predictable schedule.
What to demand when you call: ask for a written line-item estimate, confirmation they will pull permits, proof of license and insurance, whether they perform a gas-meter load test on-site, and what documentation they will hand you for rebate and warranty registration.
Hiring a local installer who knows municipal inspectors and utility procedures is not nice-to-have; it is the difference between a one-day job and a drawn-out project with surprise costs.
Leave A Comment